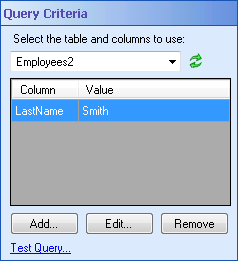
Query Criteria

This property box determines which table the Query Data activity will search and which row's values the activity will return as tokens. This activity will return the values of the first row it finds as tokens. It also will return the collection of rows that have the specified column values.

Note: This activity produces a token for each column in the specified table. The tokens for the first row the query finds are available to other activities in the workflow. If you want to access tokens for additional rows, use a For Each Row activity.

Note: You must configure the Data Source property box before configuring this property box.

To configure Query Criteria

  1. Add the Query Data activity to your workflow definition by dragging it from the Toolbox Pane and dropping it in the Designer Pane.
  2. Select the activity in the Designer Pane.
  3. Under ClosedQuery Criteria in the Properties Pane, select the table you want to query from the drop-down menu.
  4. To Add a Query

    1. Click Add in the Query Criteria property box.
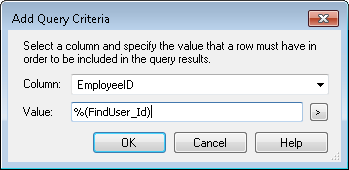
    2. In the ClosedAdd Query Criteria dialog box, select the column you want to query from the Column drop-down menu.
    3. Next to Value, type in a value to search for in that column, or click the Token button (right arrow) to use tokens.
    4. Tip: If you want a token to be replaced by the null value in the case that the token's value is blank (the empty string), apply the NULL token formatting expression. If you want to query a column for the null value, insert the NULL token: %(DB.NULL).

    5. Click OK.

    To Edit a Query

    1. Click an existing query in the Query Criteria property box.
    2. Click Edit.
    3. In the Edit Query Criteria dialog box, modify the search value. Click the Token button (right arrow) to use tokens.
    4. Click OK.

    To Remove a Query

    1. Click an existing query in the Query Criteria property box.
    2. Click Remove.
  5. Click the Test Query link to test your query.
    1. If prompted, in the Define Query Parameters dialog box, insert the value you want to test.
    2. Click OK.
    3. The Test Query dialog box will display how many rows the query will return or if there are any errors.
    4. Click OK.

This documentation is specific to version 9.0. You can find the most up-to-date help files for the latest version at Current Online Laserfiche Product Help Files.

For further help or feedback, please see the Laserfiche Support Site.


© 2013 Laserfiche